Template:Grid/Infuser: Difference between revisions
Jump to navigation
Jump to search
No edit summary |
No edit summary |
||
| Line 2: | Line 2: | ||
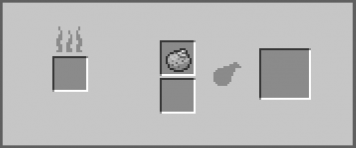
<div style="position:relative; width:356px; height:158px;"> | <div style="position:relative; width:356px; height:158px;"> | ||
[[File:InfuserGUI.png|356px|link=|alt=]] | [[File:InfuserGUI.png|356px|link=|alt=]] | ||
<!-- ── Top ingredient ── --> | <!-- ── Top ingredient ── --> | ||
{{#if:{{{Top|}}}|<div style="position:absolute; left:162px; top:42px;">[[File:{{#if:{{{Top-image|}}}|{{{Top-image}}}|Grid_{{{Top}}}.png}}|32px|class=pixelated|link={{{Top-link|{{{Top}}}}}}|alt={{{Top}}}]]</div>}} | {{#if:{{{Top|}}}|<div style="position:absolute; left:162px; top:42px;">[[File:{{#if:{{{Top-image|}}}|{{{Top-image}}}|Grid_{{{Top}}}.png}}|32px|class=pixelated|link={{{Top-link|{{{Top}}}}}}|alt={{{Top}}}]]</div>}} | ||
<!-- ── Bottom ingredient ── --> | <!-- ── Bottom ingredient ── --> | ||
{{#if:{{{Bottom|}}}| | {{#if:{{{Bottom|}}}|<div style="position:absolute; left:161px; top:80px;">[[File:{{#if:{{{Bottom-image|}}}|{{{Bottom-image}}}|Grid_{{{Bottom}}}.png}}|32px|class=pixelatedlink={{{Bottom-link|{{{Bottom}}}}}}|alt={{{Bottom}}}]]</div>}} | ||
<!-- ── Left fuel slot ── --> | <!-- ── Left fuel slot ── --> | ||
{{#if:{{{Left|}}}| | {{#if:{{{Left|}}}| | ||
<!-- custom fuel provided --> | |||
<div style="position:absolute; left:54px; top:56px;"> | <div style="position:absolute; left:54px; top:56px;">[[File:{{#if:{{{Left-image|}}}|{{{Left-image}}}|Grid_{{{Left}}}.png}}|32px|class=pixelated|link={{{Left-link|{{{Left}}}}}}|alt={{{Left}}}]]</div>| | ||
<!-- default fuel = Coal --> | <!-- default fuel = Coal --> | ||
<div style="position:absolute; left:54px; top:56px;"> | <div style="position:absolute; left:54px; top:56px;">[[File:Minecraft-coal.png|32px|class=pixelated|link=https://minecraft.wiki/w/Smelting#Fuel|alt=Coal]]</div>}} | ||
<!-- ── Output ── --> | <!-- ── Output ── --> | ||
{{#if:{{{Output|}}}| | {{#if:{{{Output|}}}|<div style="position:absolute; left:268px; top:58px;">[[File:{{#if:{{{Output-image|}}}|{{{Output-image}}}|Grid_{{{Output}}}.png}}|32px|class=pixelated|link={{{Output-link|{{{Output}}}}}}|alt={{{Output}}}]]</div>}} | ||
<!-- optional number overlay --> | <!-- optional number overlay --> | ||
{{#if:{{{OA|}}}| | {{#if:{{{OA|}}}| | ||
<div style="position:absolute; left:201px; top:71px; width:64px; height:24px; overflow:hidden;"> | <div style="position:absolute; left:201px; top:71px; width:64px; height:24px; overflow:hidden;">{{GridText|white|{{{OA|}}}}}</div>}} | ||
</div></div>{{#if:{{{nobreak|}}}||{{-}}}} | </div></div>{{#if:{{{nobreak|}}}||{{-}}}} | ||
</includeonly> | </includeonly> | ||
Revision as of 14:59, 13 June 2025
Example (default fuel):
Custom fuel override: